I’ve
finished the neon willow blanket!!! I’ve decided on a name for it too, I’m calling it
the Disco Willow (I hooked a lot of it whilst watching ‘That 70s Show’, and it’s
kind of disco colours I think…)
I've been hooking this little blanket along with the Cherry Heart Blanket Along, hosted by Sandra over on Ravelry. It's my first time joining in with a group, and my first time being active on Ravelry. I've found it great to interact with all the other blanketeers as we've grown our creations, and I've had some lovely feedback. Not least of which was all of the responses to my cry for help with choosing a background colour for the neon motifs! Several people came to my rescue with great suggestions, and Sandra and Patchwork Dragon both recommended navy, which is the colour I went with in the end - and am very happy with!
 |
| Disco Willow! |
They
are all joined using a join-on-the-go method which I described here, and I think
that’s worked out pretty well too. I wasn’t sure this would work so well on
solid rows of crochet (rather than granny rows which have gaps), but I’m really
happy with it on this blanket. I do like the effect of crocheting squares
together, but I would definitely use this method again too.
With
joining complete, I then did a round of navy trebles all the way around the
entire blanket. Where two squares meet and you have their corner chain to work into, I did a treble-2-together (tr2tog), or treble decrease, crossing each corner chain. A far better explanation of this can be found over at Bunny Mummy here.
This round not only tidies up the outer edges of the joined squares by going over all the
joins etc, but it also balances the look of it – where the squares are joined
to each other you get a double thickness of the navy colour, but on the outside
edges you only have a single thickness of navy. Adding the navy again all the
way around balances this out (I should have done 2 rows really, as the rest of
the navy is 2 rows, but I was impatient to finish! This is the same reason that I don't have any 'in progress' photos of the border being done...)
For
the rest of the border, I wanted a simple pattern as I think the colours shout loud enough
for themselves! I didn’t have much coloured yarn left, but I did want to use it as a simple yet striking feature. I came up with plan to use one colour for each
quarter of the square blanket, so that each new colour starts/finishes halfway
down each side, using a simple V stitch. I just did one row of coloured Vs,
followed by one row of navy Vs, and I love it!
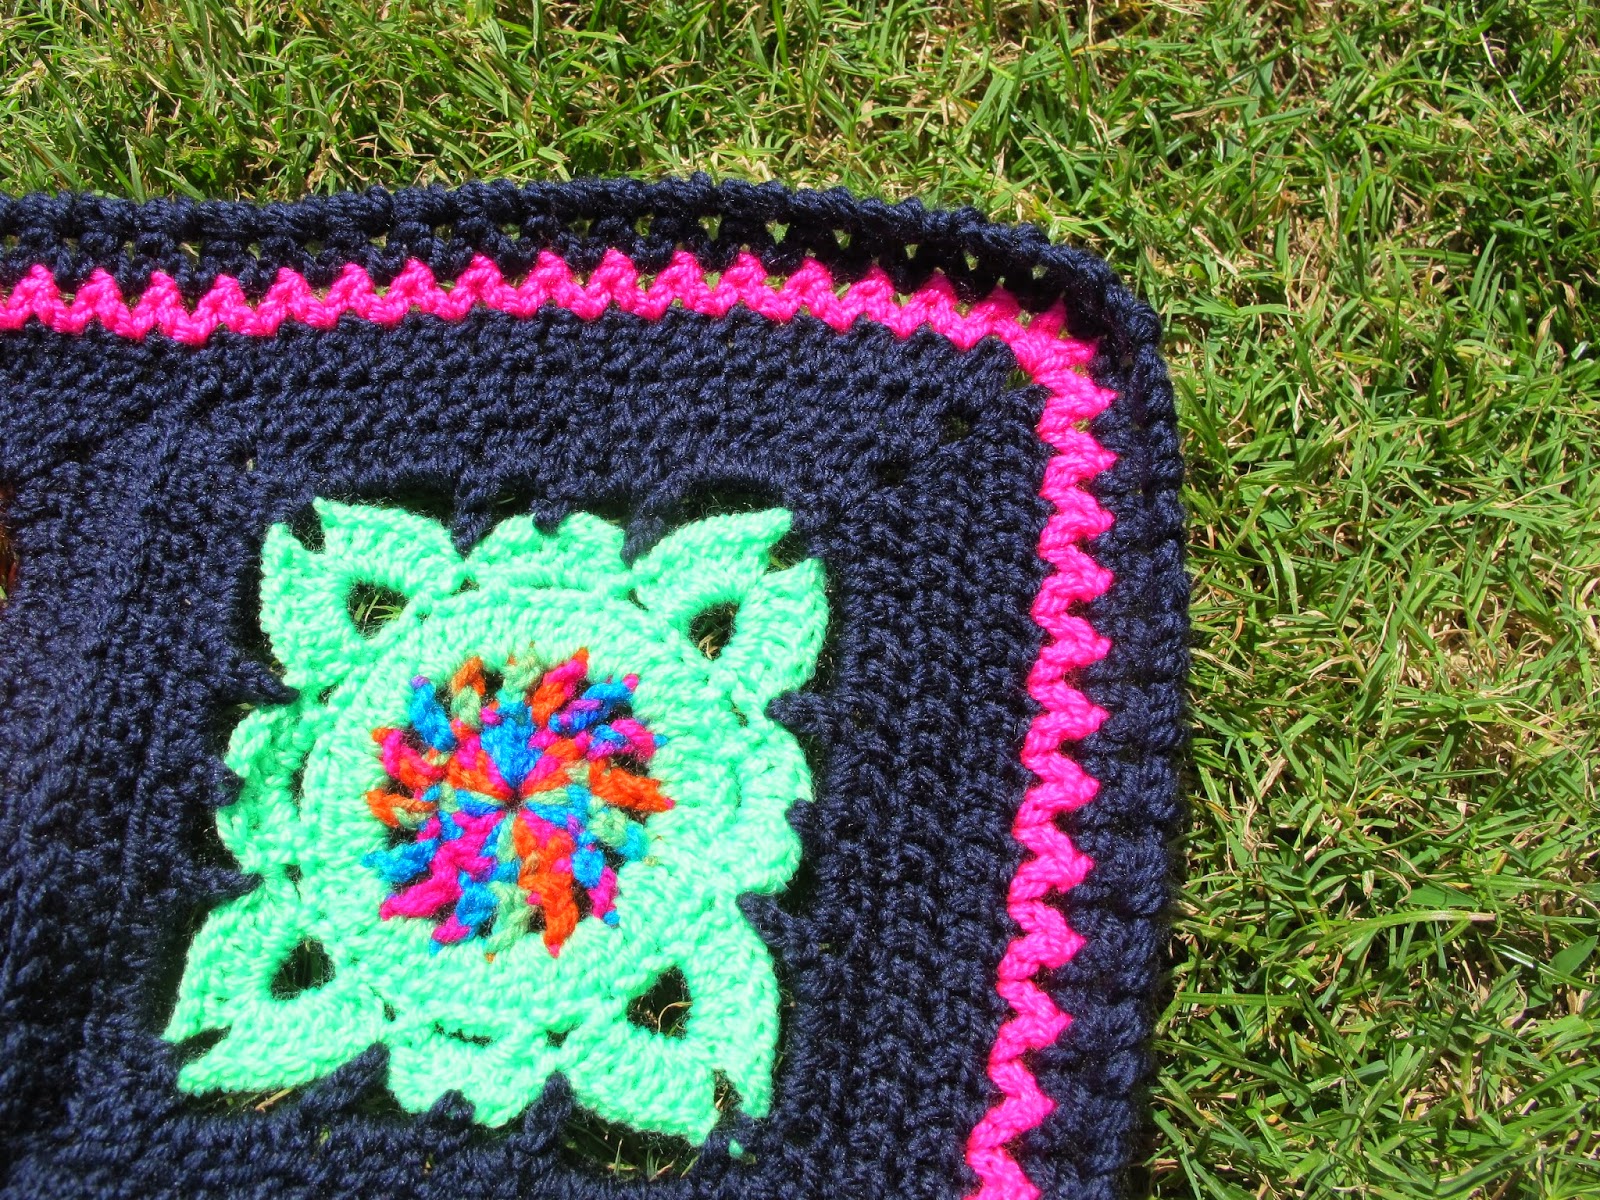 |
| In the Pink Corner! |
 |
| Turquoise Corner |
 |
| All the Corners! |
For
the final round, I wanted something really simple just to finish it off while
preserving the navy V shapes. I could have done a simple row of double crochet,
but I wanted something a little more interesting than that. I remembered seeing
Crab Stitch on Pinterest before, so I quickly searched it to check how to do
it. It’s very simple in theory: you hook double crochet stitches, but you hook
backwards (going left to right for right-handers, or right to left for lefties
like me). This sounds really simple, but I actually found it quite fiddly to
get the hang of and get the tension correct, so I ended up with a bit of a
lumpy final edge. I decided that this adds to the charm though, which gave me
the excuse I needed to not have to frog it and go round again!
 |
| Lumpy Crab Stitch, but I'm really pleased with my colour changes on the Vs :) |
That's probably enough waffle! Do you want to see how the whole thing looks?

I couldn't get a good enough photo over this mini sofa, so a trip to The Strand was in order so I could lay it out properly. I felt a bit silly at the busy sea front, laying out my blanket and snapping away. This led to rushing, so I didn't get a really good shot, but hopefully these are ok:


 |
| I love the simplicity of the Vs, and the effect of the different colours on each quarter :) |
So there we have it, the finished blanket! I can't quite believe how quickly I made this: although I picked up my willow squares for the blanket-along on 11th March, I only started making these particular squares a few days later, and then the whole thing was finished on 27th March. That's just under 2 weeks of serious hooky!
For a change, I kept track of what yarn I used! So here are some Facts and Figures:
The
finished blanket is a square roughly 125cm on each side, made up of 64 willow
squares, with equal numbers of each colour. I’ve tried to lay out the colours
so that they are evenly distributed, but not in too obvious a repeating pattern,
and I think it worked out ok :)
I used:
4.5mm hook.
1 ball each of Stylecraft Special DK in Fiesta, Bright Green, Turquoise and Jaffa.
1 ball of Patons Fab in Fruity. (I had leftovers from each of these)
7 balls of a store brand navy yarn from Spotlight (4 Seasons Marvel Soft 8 ply). This is a really dark navy, which I think works well, so maybe Stylecraft's Special DK in Midnight would be a good alternative?
I think that's all the bumpf you need, but if you do have any questions, feel free to ask away in the comments :)
As I've just said on Ravelry, this looks absolutely fabulous! I wish I could make blankets as quickly and beautifully. I hope you thoroughly enjoy using it.
ReplyDeleteOoh thank you! I did very little other than crochet over the last couple of weeks to be honest, but even so I'm surprised that I finished a blanket in that time! I feel a little bit drained now after that effort, but I'm sure that won't last long and soon I'll be deciding what to work on next!
DeleteI'll pop over to yours shortly to "hi" too :)
Dx
Debbie, I love it, I am sure it will be well admired on your picnic trips xx
ReplyDeleteThank you! I certainly hope so :) I might need to back it with something though to stop the ants crawling through the middle of it... Ew ants!! ;)
DeleteDxx
It's beautiful and I can't believe how quickly you did it! :)
ReplyDeleteThanks so much for the link love too.
S x
You're very welcome for the link love!
DeleteI can't believe how quickly I made all that either! I think I went into crochet-shock when it was finished... That won't last long though - I have an order from Deramores winging it's way down under ;)
Thank you so much for hosting the BAL, it's my first 'join in with other people', and I really loved taking part!!
Dxx